

To successfully register for the PipeOps hackathon, you will be required to do the following;
- Create a free PipeOps account
- Deploy a Nova server using PipeOps free credits
- Deploy a test project to get a project URL
Task 1: Create a free PipeOps account
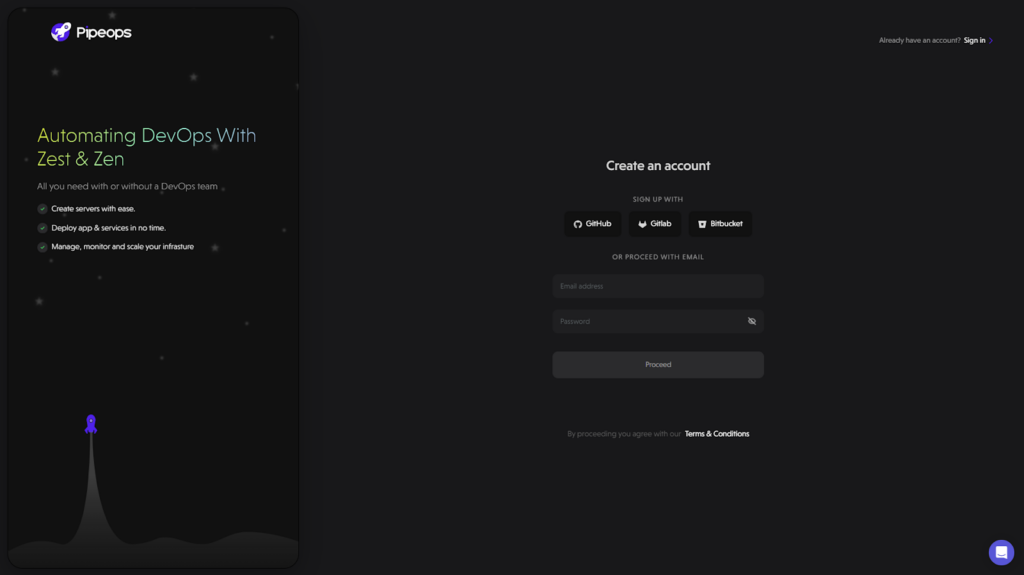
Step 1: Open your preferred web browser and navigate to the pipeops sign up page. You can use the direct URL: https://console.pipeops.io/auth/signup
Step 2: Sign In Options
In the ‘Create an account’ sign up box, you have 4 options to sign up.
- GitHub account.
- GitLab account.
- BitBucket account.
- Email account.
In the first 3 options, you will need to enter your credentials to allow PipeOps to connect with your account. You will not need to connect to that repository provider later if you already chose it as your sign up method.
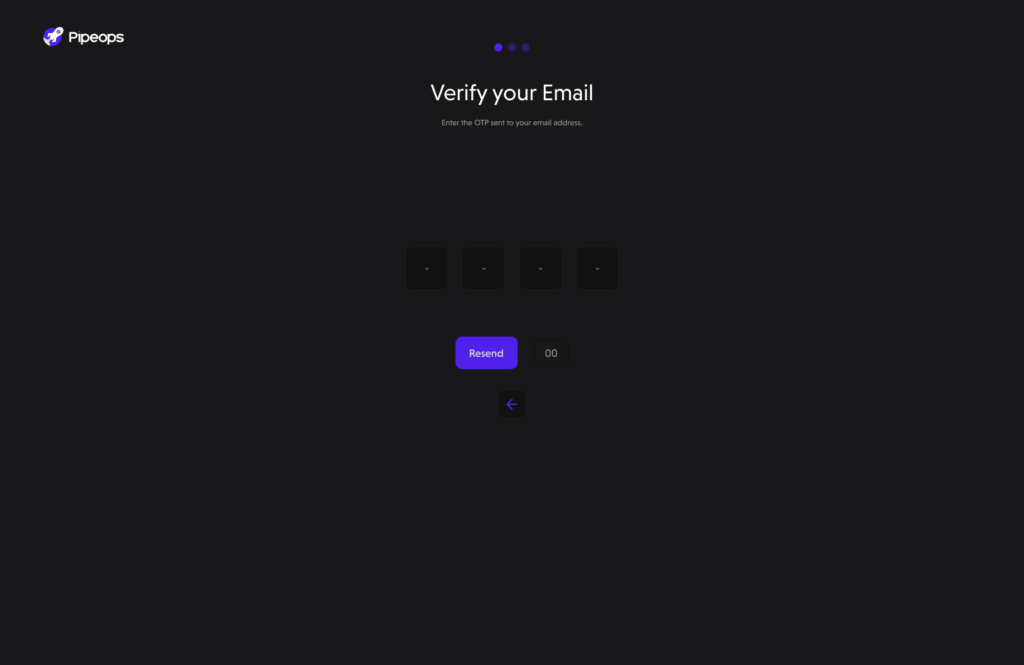
Step 3: Provide your information for the onboarding
On the registration page, you will need to provide your personal information for your PipeOps account and then answer the onboarding questions that will follow. This should take you less than 2 minutes to complete.
Step 4: Complete Registration
After customizing your workspace, you’re now ready to complete the registration process. Review the information you’ve provided, make any necessary adjustments, and click the “Finish” button.
You are now set to proceed to creating your server.
Task 2: Deploy a Nova Server using Free PipeOps Credits
Congratulations! You have successfully created your PipeOps account. We will now walkthrough how to set up your Nova Server in a series of short easy to follow steps:
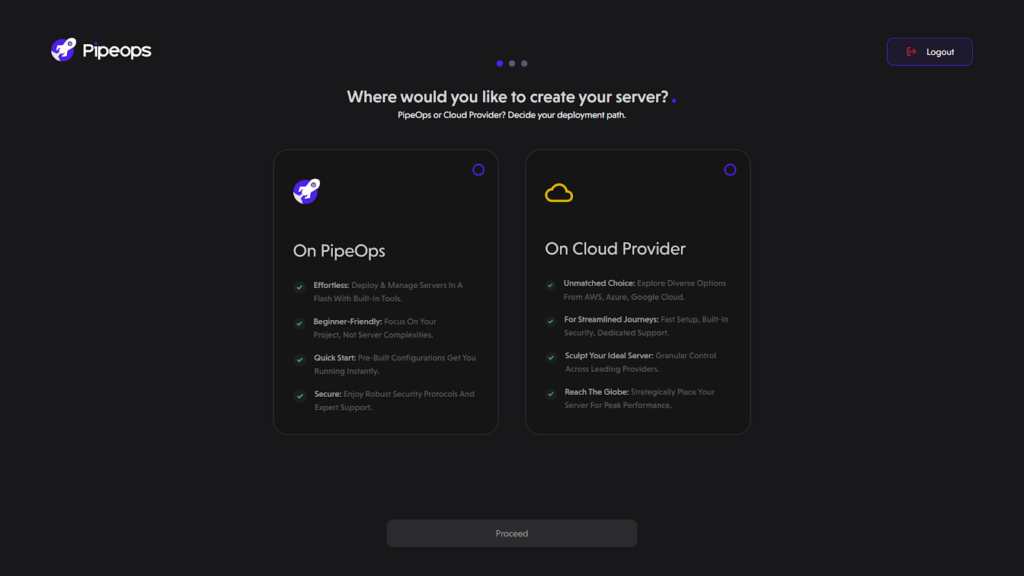
Step 1: Select Your Server Hosting Platform
Whether you are just continuing your account creation process or just trying to deploy an extra server, The below guide still applies to both cases. After choosing to proceed from the previous step, you will be brought to this page. Please make sure you select “On PipeOps“
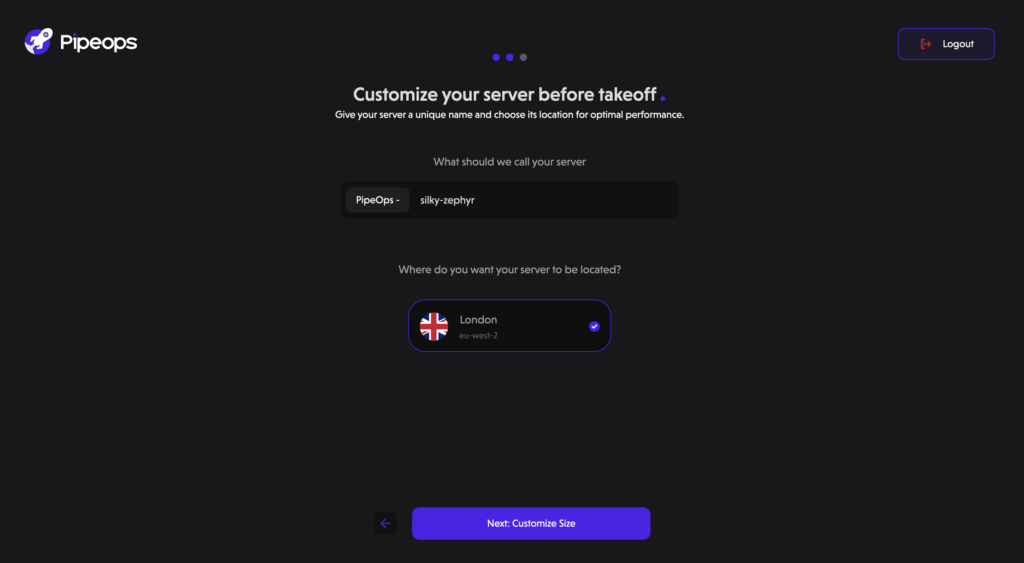
Step 2: Decide On The Physical Location Of Your Server
After selecting “On PipeOps” as your server creation method, you’ll then be directed to:
- Choose a server name.
- Select your server location. We’ve implemented a geo-location pricing model to ensure you’re billed in your local currency, shielding you from exchange rate fluctuations.
Step 3: Customize Your Server
You can choose between the Nova Sapa, Nova Pro, Nova Duo and Nova Chrono server instances. Each instance comes with varying amounts of VCPU, Memory and storage.
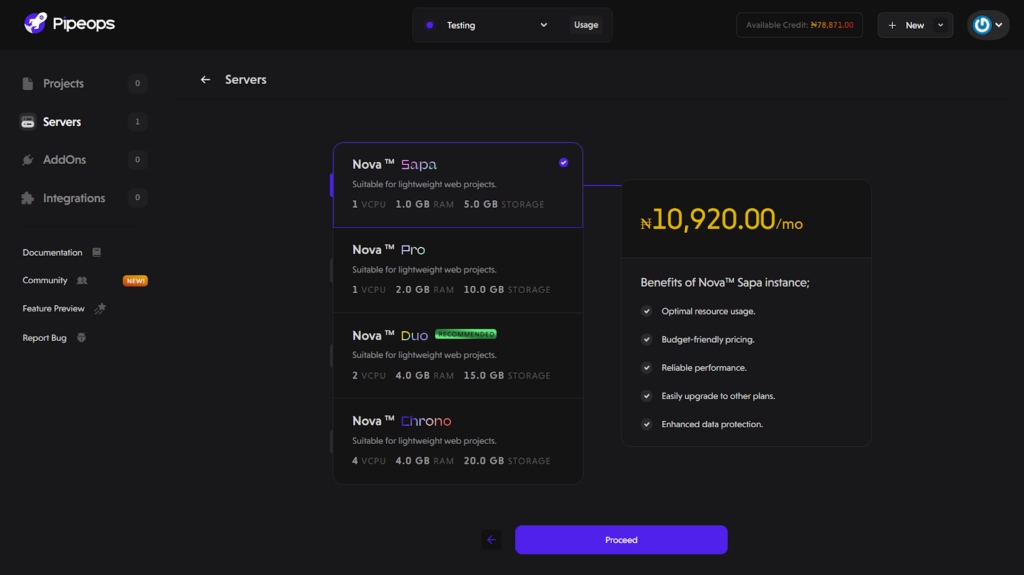
Once you’ve decided on your desired server instance, PipeOps will automatically check if your credit balance covers the cost. You should have enough credits to deploy to “Nova Sapa” so please select that option.
Step 4: Server Creation Completion
After successfully making payment for your server using your free credits, you’ll receive a confirmation stating “Congratulations! Your subscription is active.” Click on the Done button to proceed to the next steps in the setup process.
Task 3: Deploying a test project to get the Project URL
To edit the sample HTML file provided, follow these steps:
Step 1: Fork the Repository
- Navigate to the GitHub repository at https://github.com/pipeops-dev/pipeops-html
- Click on the “Fork” button in the upper right corner of the repository page.
This will create a copy of the repository in your GitHub account, allowing you to make changes without affecting the original repository.
Step 2: Deploying your Application
- On your dashboard, under the “My Projects” tab, click on the “Deploy a new Project” button and select “Web project.”

Connecting a repository to your account is essential for seamless deployment. If you created your account using any of the repository providers (GitHub, GitLab, Bitbucket), you can skip this step, as your account is already linked.
Step 3: Check Repository Connection
- If you created your account with GitHub, GitLab, or Bitbucket, your repository is already linked.
- You can proceed to the next step if your account is pre-linked. If not, check the step below.
Step 4: Connect Repository
- If you need to connect a repository manually, click on your preferred repository provider (GitHub, GitLab, Bitbucket).

- Authenticate your account to establish a connection between your repository provider and your dashboard.

- Once authenticated, your repository is successfully connected.
Congratulations! Your repository is now linked to your account. You can proceed with deploying your first project and leveraging the full power of our platform.
- Select “Linked repository”, then select the “Select repo source” drop-down. Choose the repo you will use for the project. If you would like to use a different repository, click on “Link new repo” and select from any of the repo providers.
- Select your repo organization from the “Select Organization” drop-down.
- Select the repository you just cloned and the main branch. Click on proceed.

Step 5: Configure Your Project
Your project has been created, and your summary dashboard is shown to you. It contains your project name and environment, server, project repository, project source and cost. Leave as default and click proceed.

Your project build settings dashboard is now shown to you. Your project framework should automatically be selected for you. If this is not selected by default, please select a framework and build method of choice from the options provided.

Step 6: Deploy Your HTML Application
- Click deploy.
- Monitor the logs on the build logs section. After a successful build, click on the “View project” button to view your successfully deployed application.

Step 7: Celebrate Your Swift Deployment!
Congratulations! You have successfully deployed your React application using PipeOps. Your app is now live and accessible to users worldwide.

To view the application that was deployed, click the View Project link.

You will need this project link when signing up on the Hackathon’s registration page. If you encounter any issue, please visit https://pipeops.io and click on the support icon on the bottom right to speak to an agent.
Good luck!


Done and dusted