


We’re excited to introduce you to our streamlined onboarding process for the new Nova Server, divided into two sections:
- Creating your account
- Creating your Nova Server
Phase 1: Account Creation
This section comprises a series of simple, easy-to-follow steps:
Step 1: Open your preferred web browser and navigate to the pipeops homepage. You can use the direct URL: https://pipeops.io.
Step 2: Visit the Registration Page
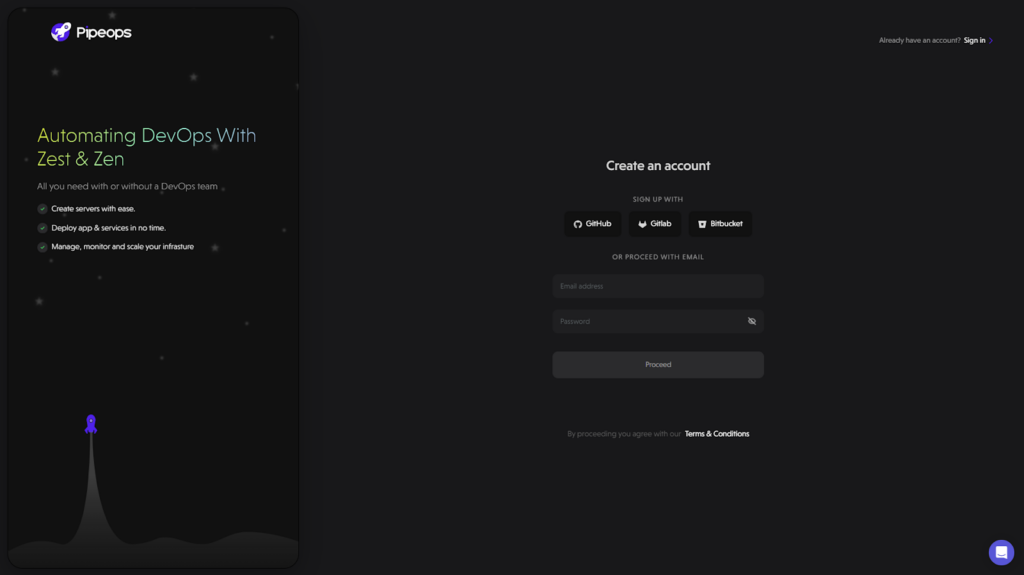
To begin the registration process, click on the ‘Deploy app’ or ‘Deploy a free app’ button on the top right corner, or the middle of your screen. This would redirect you to the pipeops signin console. Click on the ‘Create a new account here’ link, and begin your registration. Or use the direct URL: https://console.pipeops.io/auth/signup.
Step 3: Sign In Options
In the ‘Create an account’ sign up box, you have 4 options to sign up.
- Sign up using your existing GitHub account.
- Sign up using your existing GitLab account.
- Sign up using your existing BitBucket account.
- Sign up using an email account.
In the first 3 options, you will need to enter your credentials to allow PipeOps to connect with your account. You will not need to connect to that repository provider later if you already chose it as your sign up method.
Step 4: Provide Your Email Address
On the registration page, for the email option, you’ll be prompted to enter your email address. This will be your primary contact for important updates and notifications related to your account. Please make sure to use a valid and accessible email address.
Step 5: Set a Strong Password
Create a secure password for your account. A strong password typically includes a combination of uppercase and lowercase letters, numbers, and special characters. This ensures the safety and integrity of your account. Click on ‘Proceed’.
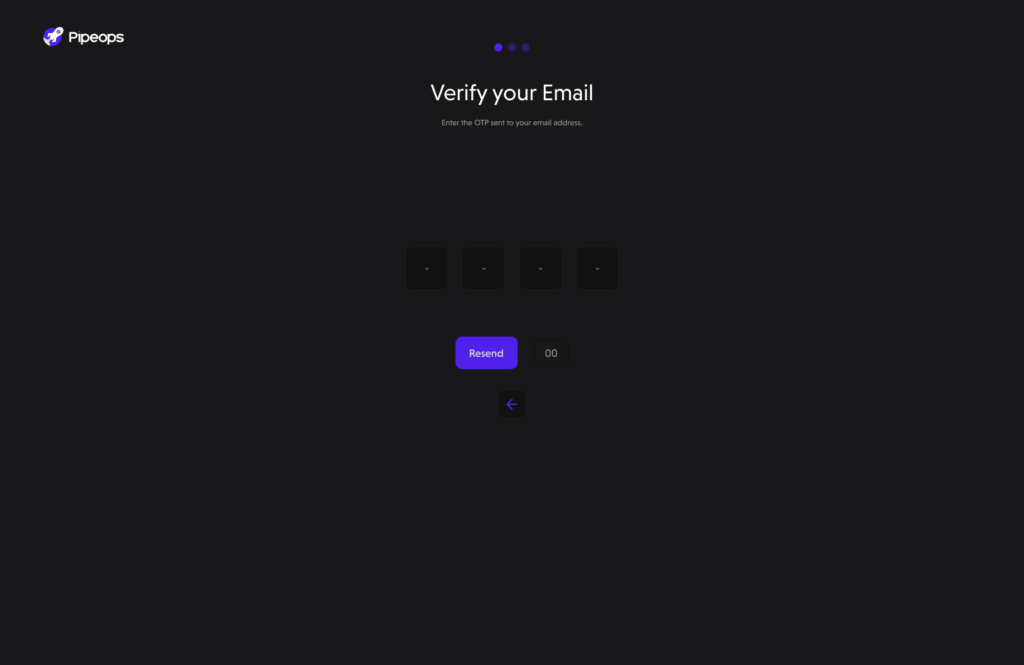
Step 6: Verify Your Email Address
After submitting the registration form, you will be redirected to a page requesting for your registration OTP. Check your email inbox for a verification message containing the token, paste into the box and proceed.
Step 7: Customize Your Workspace
Before completing the registration, we want to tailor your experience with PipeOps to suit your needs. You would answer the following questions to configure your workspace:
- Workspace Name:
This section prompts you to choose a name for your workspace. The workspace name helps you organize and distinguish your projects within PipeOps.
- Your role/Job Title:
Here, you can specify your role or job title, which provides context for your usage of PipeOps. Whether you’re a software developer, founder, or DevOps engineer, identifying your role will help us serve you better.
- Goal with PipeOps:
This section helps clarify your objectives for using PipeOps. You can select from options such as exploring PipeOps features for companies or deploying a simple project to the cloud. Understanding your goals allows us to provide relevant guidance and support.
- Discovering PipeOps:
This section inquires about how you found out about PipeOps. Whether through Linkedin, a google search, or another avenue, knowing how users discover PipeOps helps us improve and reach more people.
Once you’ve answered these questions, your workspace will be configured accordingly, providing a personalized experience tailored to your specific requirements.
Step 8: Complete Registration
After customizing your workspace, you’re now ready to complete the registration process. Review the information you’ve provided, make any necessary adjustments, and click the “Finish” button.
You are now set to proceed to creating your server.
Phase 2: Select your Server Choice
Congratulations! You have successfully created your PipeOps account. We will now walkthrough how to set up your Nova Server in a series of short easy to follow steps:
Step 1: Select Your Server Hosting Platform
Whether you are just continuing your account creation process or just trying to deploy an extra server, The below guide still applies to both cases. After choosing to proceed from the previous step, you will be brought to this page.
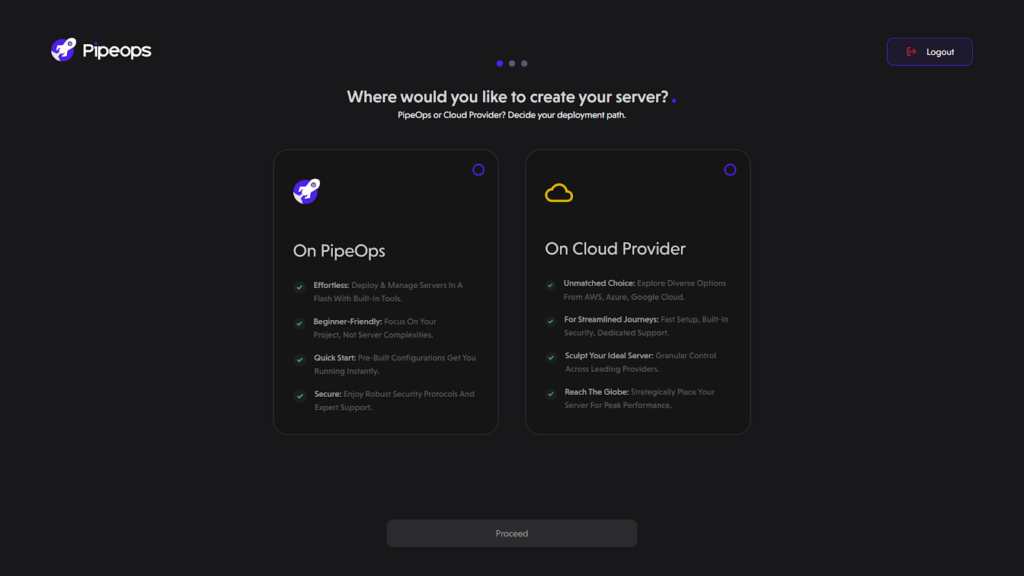
Upon accessing your PipeOps dashboard, you’ll be prompted to initiate the server creation process. At this point, you’re presented with the option to choose where you want to create your server. You can decide to deploy your server either “On PipeOps” or “ On Cloud Provider”. For our purposes, we’ll opt for the “On PipeOps” method. If you want to deploy “On Cloud Provider”, check out our Mastering AWS Deployment on PipeOps article.
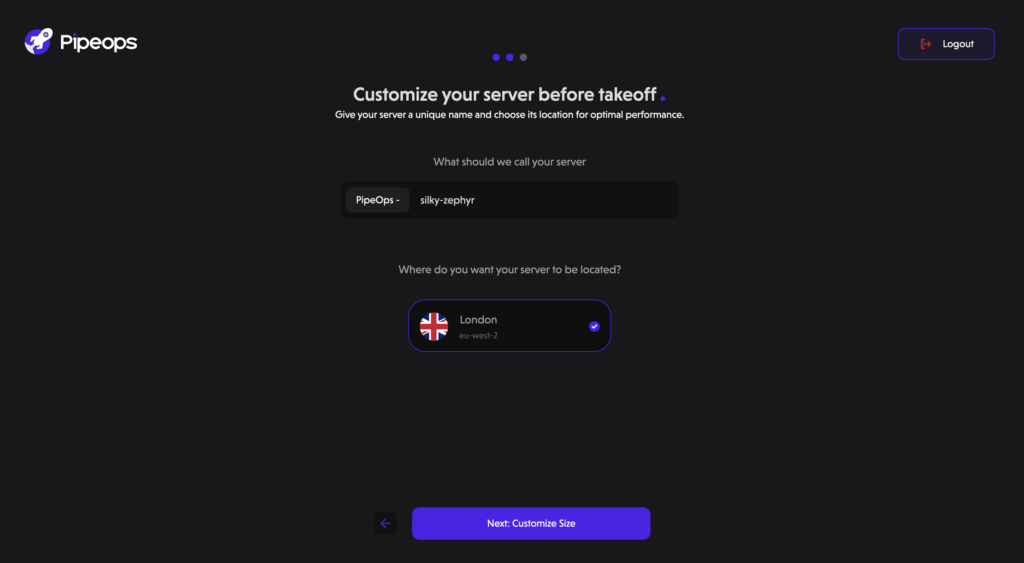
Step 2: Decide On The Physical Location Of Your Server
After selecting “On PipeOps” as your server creation method, you’ll then be directed to:
- Choose a server name.
- Select your server location. We’ve implemented a geo-location pricing model to ensure you’re billed in your local currency, shielding you from exchange rate fluctuations.
Step 3: Customize Your Server
After selecting the location for your server, it’s time to tailor it to your specific needs. Customize your server based on these three key metrics:
- VCPU (Virtual Central Processing Unit):
Choose the number of virtual CPUs to allocate to your server. This determines the processing power available for running your applications and handling tasks.
- Memory:
Select the amount of memory (RAM) to allocate to your server. Memory is crucial for storing and accessing data while your applications are running. Choose a suitable amount based on the requirements of your applications and workload.
- Storage:
Determine the storage capacity for your server, which includes both the operating system and data storage. Consider the size of your applications and the amount of data they generate to ensure you have adequate storage space.
You can choose between the Nova Sapa, Nova Pro, Nova Duo and Nova Chrono server instances. Each instance comes with varying amounts of VCPU, Memory and storage.
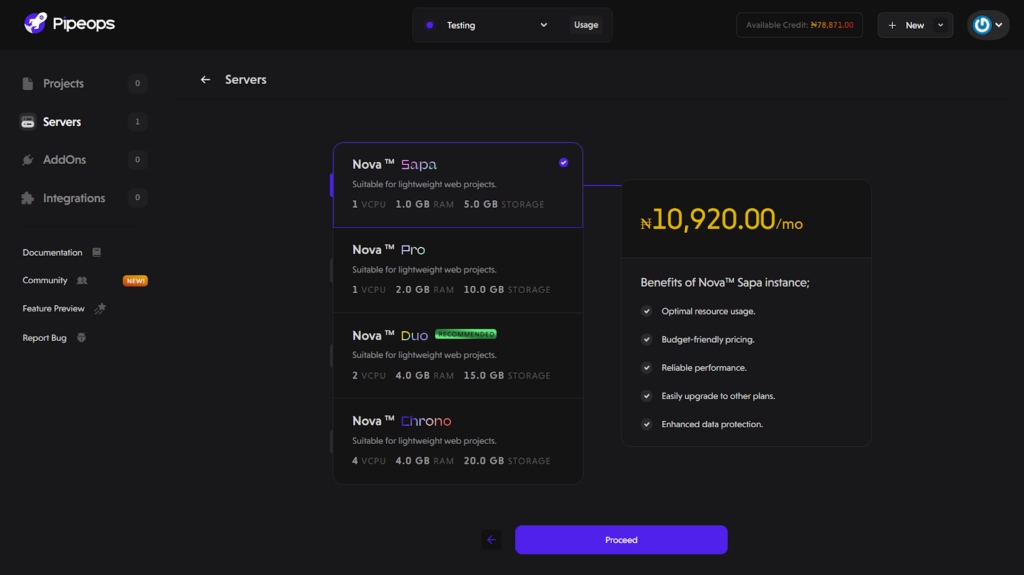
Once you’ve decided on your desired server instance, PipeOps will automatically check if your credit balance covers the cost.
If you don’t have enough credits for your desired server instance, you’ll be directed to a payment portal where you can make the necessary payment to access seamless deployments with PipeOps.
However, if your credits are sufficient, the transaction will be deducted from your credit balance without any additional charges.
Step 4: Payment Completion
After successfully making payment for your server, you’ll receive a confirmation stating “Congratulations! Your subscription is active.” Click on the Done button to proceed to the next steps in the setup process.
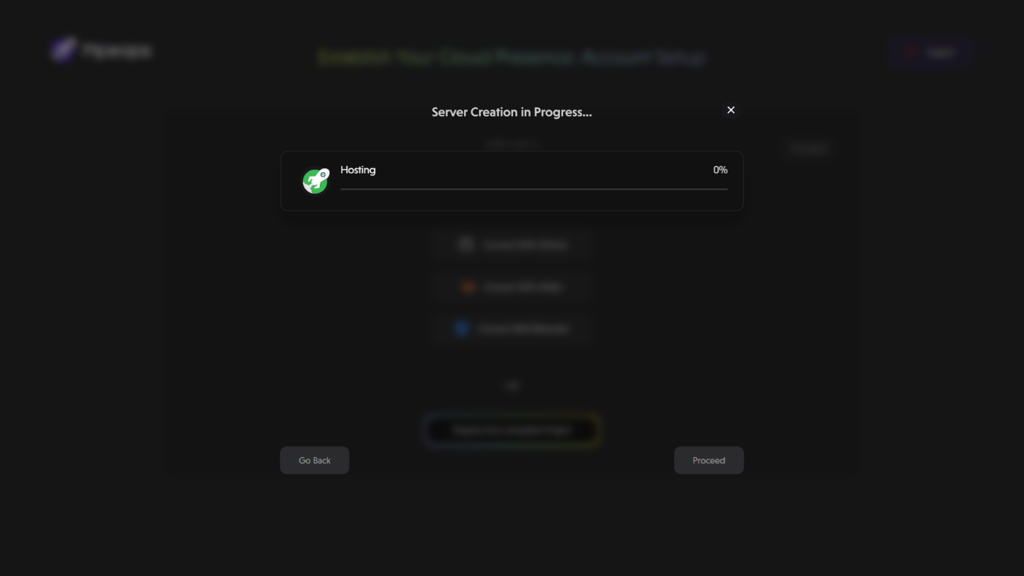
Step 5: Server Creation in Progress
In this next step, the platform will display the progress of your server creation on the screen.
Step 6: Server Creation Complete
After the server creation is complete, a confirmation message will appear.
Click Proceed to get to the server overview page of the server you just created.
Step 7: Proceed to project deployment heaven
After successfully creating a server, you can now proceed to a deploy project, or 2 or 10 into that server. You can deploy as many projects as you want provided you still have storage space available.

