


We’re thrilled to announce some exciting changes to our offerings, and we want you to be part of the journey! We’ve streamlined our process to make it easier for you to get started with our Nova Server. Simply log in to your dashboard, and you’ll receive a message detailing the enhancements we’ve made.
Major Changes to Our Offerings
- Improved Onboarding: We have made it easier for you to get started with us by tailoring your experience with us based on how you want to use our product.
- PipeOps managed Servers: Say goodbye to limitations! Instead of being confined to a set number of active projects, you can now create your own managed servers on PipeOps. Our Nova Servers empower you to deploy multiple projects without the hassle of paying per project. You can deploy as many projects as your server space can handle.
- PipeOps Credits: To help you explore our new features, we’re offering free deployment credits to kickstart your Nova Servers experience.

Getting Started with the New Nova Server
We’re always looking for ways to make your deployment journey as stress-free as possible. This has led us to introduce our new server-based subscription model, designed to make project deployment more flexible and cost-effective for you. With this model, instead of paying per project or deployment, you can now pay per server. This means you can deploy as many projects as your server capacity can handle, all under the single payment you make for your server.
Benefits of the New Nova Server Model
- Cost Efficiency: By paying per server instead of per project, you can optimize your expenses and avoid the hassle of managing multiple payments for different projects.
- Scalability: With the ability to deploy multiple projects on a single server, you have the flexibility to scale your operations without worrying about additional costs per project.
- Simplified Billing: Enjoy a streamlined billing process with one consolidated payment for your server subscription, making it easier to manage your expenses and budget effectively.
To begin exploring these exciting new features, you’ll need to cancel your current subscription and create a new one. This process will also involve creating the server to which your projects will be migrated and finally migrating your projects to the new server.

To take advantage of our new server-based subscription model, you’ll need to activate your subscription by creating a Nova Server. Here’s how to get started:
Step 1: Select Your Server Hosting Platform
After choosing to proceed from the previous step, you will be brought to this page where you’ll be prompted to initiate the server creation process.

At this point, you’re presented with the option to choose where you want to create your server. You can decide to deploy your server either “On PipeOps” or “ On Cloud Provider”. For our purposes, we’ll opt for the “On PipeOps” method. If you want to deploy “On Cloud Provider”, check out our Mastering AWS Deployment on PipeOps article.
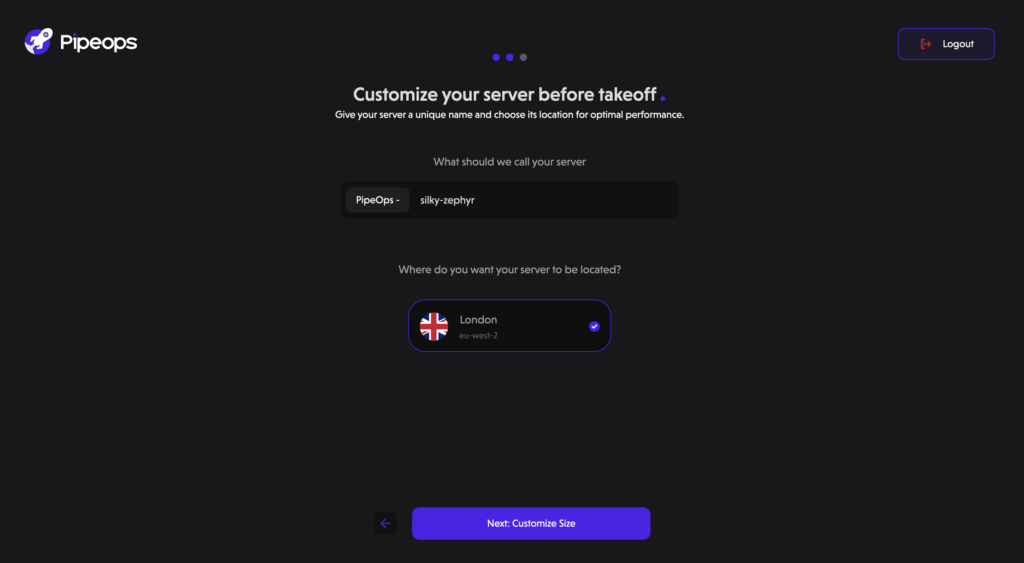
Step 2: Decide On The Physical Location Of Your Server
After selecting “On PipeOps” as your server creation method, you’ll then be directed to:
- Choose a server name.
- Select your server location. We’ve implemented a geo-location pricing model to ensure you’re billed in your local currency, shielding you from exchange rate fluctuations.
Step 3: Customize Your Server
After selecting the location for your server, it’s time to tailor it to your specific needs. Customize your server based on these three key metrics:
- VCPU (Virtual Central Processing Unit):
Choose the number of virtual CPUs to allocate to your server. This determines the processing power available for running your applications and handling tasks.
- Memory:
Select the amount of memory (RAM) to allocate to your server. Memory is crucial for storing and accessing data while your applications are running. Choose a suitable amount based on the requirements of your applications and workload.
- Storage:
Determine the storage capacity for your server, which includes both the operating system and data storage. Consider the size of your applications and the amount of data they generate to ensure you have adequate storage space.
You can choose between the Nova Sapa, Nova Pro, Nova Duo and Nova Chrono server instances. Each instance comes with varying amounts of VCPU, Memory and storage.
Activating your subscription automatically qualifies you for free deployment credits. These credits are provided to you as a complimentary bonus, enabling you to begin deploying projects immediately without incurring any additional costs.

Once you’ve decided on your desired server instance, PipeOps will automatically check if your credit balance covers the cost.
If you don’t have enough credits for your desired server instance, you’ll be directed to a payment portal where you can make the necessary payment to access seamless deployments with PipeOps.
However, if your credits are sufficient, the transaction will be deducted from your credit balance without any additional charges.
Step 4: Payment Completion
After successfully making payment for your server, you’ll receive a confirmation stating “Congratulations! Your subscription is active.” Click on the Done button to proceed to the next steps in the setup process.
Step 5: Server Creation in Progress
In this next step, the platform will display the progress of your server creation on the screen.

Once the server creation is complete, you’re ready to migrate your existing projects.

Congratulations, you’ve successfully leveraged our new Nova Servers! Now, you can deploy as many projects as you want, provided you have available storage space.


